Step by Step Of Creating a Windows Service in C#.NET
Suppose We are going to create a windows service in C# and it's name is (Secondservice) and it write a text file in every 10 second
Start:
Go to: All Programme---->Microsoft Visual Studio---->Create---->new---->Windows---->WindowsService--->ok


SolutionExplorer(Right Side of the Widow)--->Right Button Click--->Rename Now rename it as SecondService
At middle part of the window click on the click here to switch to code view Write the following code:


Now go to the SecondService.cs(Design) Page:
n the Blank part Click Right----->Add Installer then two new item is added SeconService and ServiceprocessInstaller
Now Putting Mouse on SecondSErvice RightButton--->Properties
Write as following Picture shows

Now Putting Mouse on ServiceprocessInstaller RightButton--->Properties
Write as following Picture shows

After this go to solution Explorer Right button Click----->Build
After Successfully Building
Go to Source locaton of the Project SeconServie----->bin----->Debug
Now Copy the source location path Suppose( G:\c-sharp\SecondService\SecondService\bin\Debug )
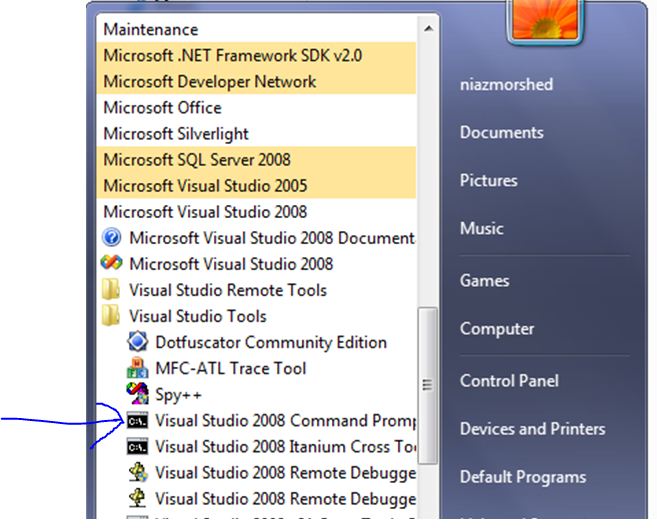
Now go to AllProgramme--->Microsoft Visual Studio---->Visual Studio Tool--->visual studio 2008 command promt

After that Paste source location you copied earlier
then Write installutil SecondService.exe press Enter
After Successfull installation
Go to All programme-------->Computer------>RightClick----->Manage
Click on Service item as indicated in the following picture

Now At the Right Side We can see there are a service named SeconService
the Click Right button on SecondService item --------->Start
Suppose We are going to create a windows service in C# and it's name is (Secondservice) and it write a text file in every 10 second
Start:
Go to: All Programme---->Microsoft Visual Studio---->Create---->new---->Windows---->WindowsService--->ok


SolutionExplorer(Right Side of the Widow)--->Right Button Click--->Rename Now rename it as SecondService
At middle part of the window click on the click here to switch to code view Write the following code:


Now go to the SecondService.cs(Design) Page:
n the Blank part Click Right----->Add Installer then two new item is added SeconService and ServiceprocessInstaller
Now Putting Mouse on SecondSErvice RightButton--->Properties
Write as following Picture shows

Now Putting Mouse on ServiceprocessInstaller RightButton--->Properties
Write as following Picture shows
After this go to solution Explorer Right button Click----->Build
After Successfully Building
Go to Source locaton of the Project SeconServie----->bin----->Debug
Now Copy the source location path Suppose( G:\c-sharp\SecondService\SecondService\bin\Debug )
Now go to AllProgramme--->Microsoft Visual Studio---->Visual Studio Tool--->visual studio 2008 command promt
After that Paste source location you copied earlier
then Write installutil SecondService.exe press Enter
After Successfull installation
Go to All programme-------->Computer------>RightClick----->Manage
Click on Service item as indicated in the following picture

Now At the Right Side We can see there are a service named SeconService
the Click Right button on SecondService item --------->Start
No comments:
Post a Comment